Content:
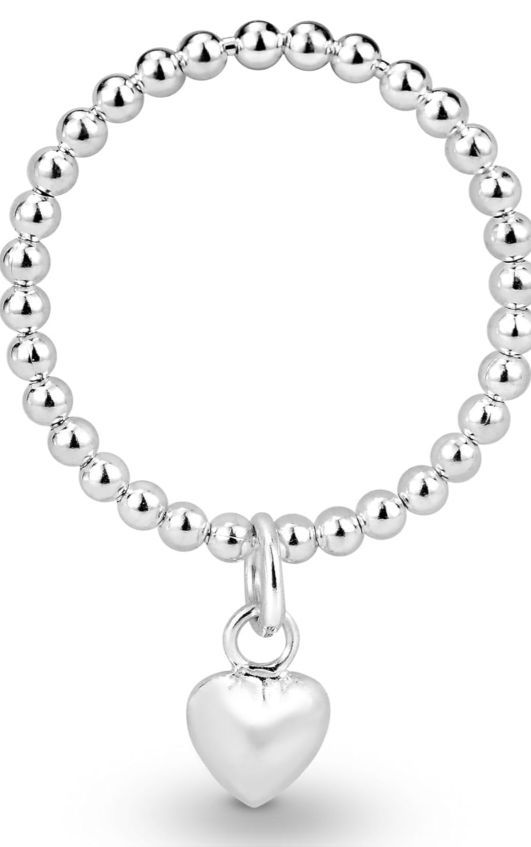
ClawaBear are about to re-launch their made to fit beaded rings sing sterling silver and pearl beads, genuine crystal chips and charms.
Read about the process and why they have decided to bring back this little jewellery gem!

Hello my Angels.
I hope you are doing well?
I am so excited to bring you some fabulous news!
I have decided to bring back the ClawaBear made to fit beaded rings because. one, I miss creating them, and two, the are really pretty!
I have researched and found the most wonderful local artisans that produce gorgeous sterling silver and pearl beads and what make this so great is that they are a local business in my community and I am all about supporting other local businesses.
So I will walk you through the process of how I make these incredible unique rings and how I make my own charms for the ring centre pieces.

The Postman:

Well all know that feeling. We spot the postman on his way to our door and excitedly wait for those sounds, the doorbell or the rat a tat tat of the letter box!
I have a great relationship with our postie. I take in all the neighbours parcels because I work from home and end up having my own little post office in my hallway, prepared, waiting for the neighbours to get home so I can happily deliver them. This saves our postie a lot of hassle of taking back his wares to keep trying to deliver them every day and he laughs at my little squeals when I am so elated to see parcels that are actually for me.
So when the new glorious sterling silver and different coloured pearls beads and genuine crystal chips were carefully laid in the neatly packaged box I was in awe as I opened it. Saying to myself "I can't wait to get started and spread the news of a re-launch of these beautiful rings.
( I don't really know why I stopped creating them, I think I just got so busy on my mission to design and create wedding tiara's I just kind of forgot about them. )

Making Coffee:
This is the most important part of my day!
My morning routines always consist of a few cups of coffee.
I turn on the radio, have a cuppa, get all my my boring household chores out of the way, feed the two beautiful dogs then clean out, feed and cuddle my eight gorgeous and loveable ferrets.
Then I lay everything I need onto my work bench. Happy and content, I make another coffee, sing along to the radio tunes ( my hubby says I can't sing but that doesn't stop me) and begin.

The Tools Of The Trade:
For my beaded ring making I need the beads sorted out into quantity and colours before I start anything else. Then, when I am happy with my little piles of choices, I decide what charms I want to add or which magical crystal chip will go best with each colour bead.
I lay out my silver fine 0.3mm jewellery wire, my scissors, a ring mandrel. any jewellery pliers I might need, jewellery glue, jump rings and of course my trusty heavy duty 10x magnifying lamp. Honestly, without my glasses and my lamp I don't know how the hell I would manage making any of my jewellery!
Then I proceed to get the hand torch, soldering pick, soldering board, rawhide mallet, metal files, silver solder, silver sheets or chips and polishing cloths and a small hand held drill.
I also use a pickling powder that is fantastic for getting oxides out of silver and gold.
And last but not least a white silver flux powder that is suitable for soldering at low temperature.
Oh and a mask! I need a mask for when I am working with the flux powder and pickle.
Making Silver Charms:

.Creating jewellery is a craft that involves a series of intricate processes, each contributing to the final exquisite piece. Let's delve into the five fundamental steps that form the backbone of jewellery making:
Sawing the Metal: This initial step sets the foundation for the jewellery piece. Using beeswax to lubricate the blade and prevent metal from sticking, artisans carefully saw the metal sheets or wires into the desired shapes. Whether it's delicate filigree work or bold geometric designs, precision is key during this stage to ensure the pieces fit seamlessly together.
Filing for Smoothness: After shaping the metal, the edges may be rough or uneven. To achieve a flawless finish, I meticulously file the metal edges until they are smooth to the touch. This process not only enhances the aesthetics but also ensures comfort for the wearer.
Working the Metal: This is where creativity and skill intertwine. Through various techniques such as forging, hammering, texturing, dapping, and doming, most artisans imbue the metal with character and depth. Each strike of the hammer and manipulation of the metal brings the design to life, adding unique nuances and dimensionality to the piece.
Soldering: Soldering is the art of joining different metal components together. Whether it's silver, gold, brass, or copper, artisans use solder to fuse the pieces seamlessly. Silver solder, in particular, is favoured for its versatility and ability to bond different metals effectively. The soldering process demands precision and finesse to ensure durable and secure connections.
Finishing Touches: The final step is where the magic truly happens. I meticulously refine the piece through various finishing techniques such as texturing, burnishing, buffing, polishing, and oxidizing. Each method adds its own distinct flair, whether it's achieving a high gloss shine, enhancing texture, or introducing subtle antiquing effects. These finishing touches not only elevate the aesthetic appeal but also enhance the durability and longevity of the jewellery.
In essence, jewellery making is a harmonious blend of artistry, technique, and passion. Each of these five processes plays a pivotal role in transforming raw materials into wearable works of art, showcasing the artisan's dedication to craftsmanship and creativity. Whether crafting timeless classics or pushing the boundaries of contemporary design, these fundamental steps serve as the cornerstone of every jewellery maker's journey.
Each charm is certainly a labour of love. It's a process that I can either lover or sometimes get a little frustrated with, but the end result is always an amazing feeling. When you inspect your work and know you have accomplished another little masterpiece.
Crystal Chips:

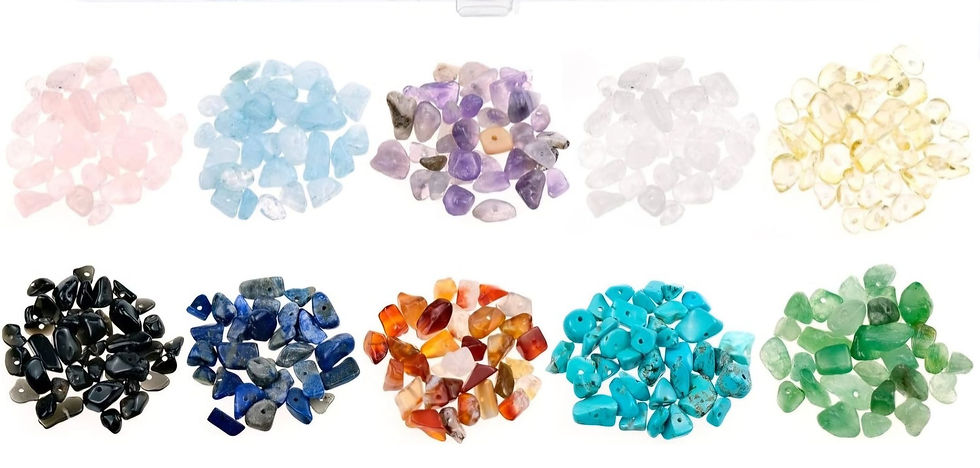
As I mentioned earlier I have found an amazing local supplier for my crystal chips and all I have to do is drill a small 1mm centre hole through them and give them an outstanding polish.
I plan on using amethyst, rose quart, turquoise, lapis lazuli and of course many others.
I just love crystals with their symbolic and magical influences and meanings.
Creating the rings:
With a bead needle in one hand and the fine jewellery wire I carefully pick up the beads I have chosen and begin to thread them being careful not to knock the dish full of beads over onto the floor. I have done that on many occasion and believe I have muttered a few swear words in the process of trying to chase them all and pick them all back up only to have to clean them all again!
The fine wire is then wound around and tied, then squished with my long nose jewellery pliers until the knot is unseen and placed inside a bead hole, a dab of jewellery glue to secure the knot, so I have my ring shape and carefully slip it onto the ring mandrel to make that circle perfect and to make the correct measuring size.
I tend to make all of the beaded rings range in size from UK 4 to 12 and the ring mandrel is great for this as it has all the sizes listed down through the mandrel.
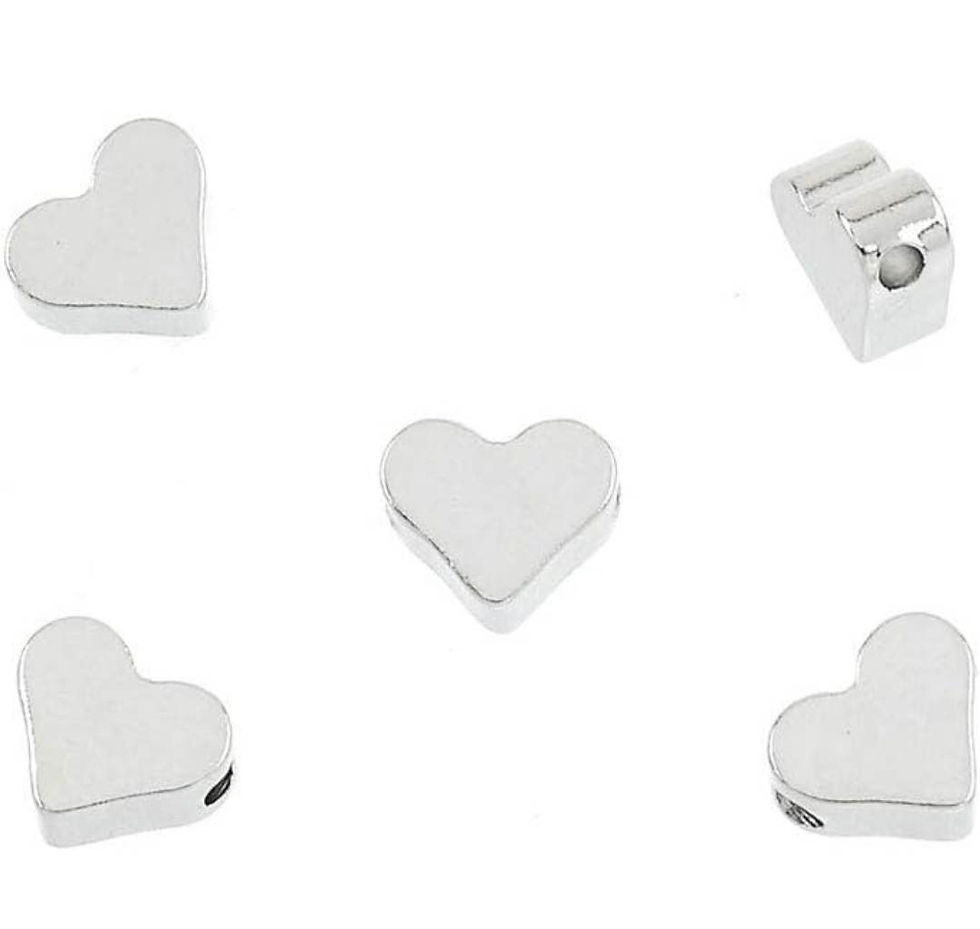
Some of the rings have a charm in the ring centre that I will have drilled a centre hole in, usually by using a 1mm drill bit and they get threaded with the beads.
I use the same process for my genuine crystal chips.
If I am adding a charm with out a centre hole I use a secure jump ring to attach the charm.
( The flat charms have a 1mm hole drilled in the top. )
The completed ring is then inspected so I can be sure there are no imperfections and given a final polish with a jewellery polishing cloth.

Hey presto! A stunning ring is born!
The Re-Launch:
The website page is prepared, it just needs all the the photographs of these gorgeous rings and of course all the descriptions and details plus the technical SEO search engine optimization, ALT text for all the photos and so on.
A facebook status update and a show off at our market stalls.
You can add us as a friend on facebook : Clawa Bear : you can see all of our latest news, products and market stall locations and dates.
So I shall carry on with my very enjoyable creating, with another cup of hot coffee as I bid you farewell and I hope you have an amazing day.
These beautiful rings will be available on our website very soon.
Much love to you & yours,
ClawaBear.


Comments